
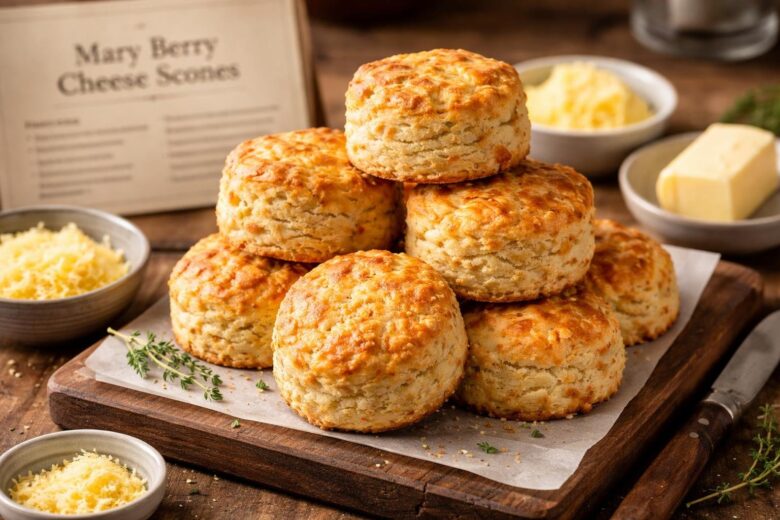
There is nothing quite like the smell of fresh baking. If you want a treat, try this Mary Berry Cheese Scones Recipe. I remember my first time making these. They filled my kitchen with a warm, cheesy aroma.
This Mary Berry Cheese Scones Recipe is perfect for beginners and experts. You can make them quickly for a lovely weekend brunch. This Mary Berry Cheese Scones Recipe always brings a smile to my family’s faces.
What Makes This Cheese Scone Special
These scones are famous for their light and fluffy texture. Many scone recipes turn out heavy or dry. However, this recipe uses the perfect balance of flour and fat.
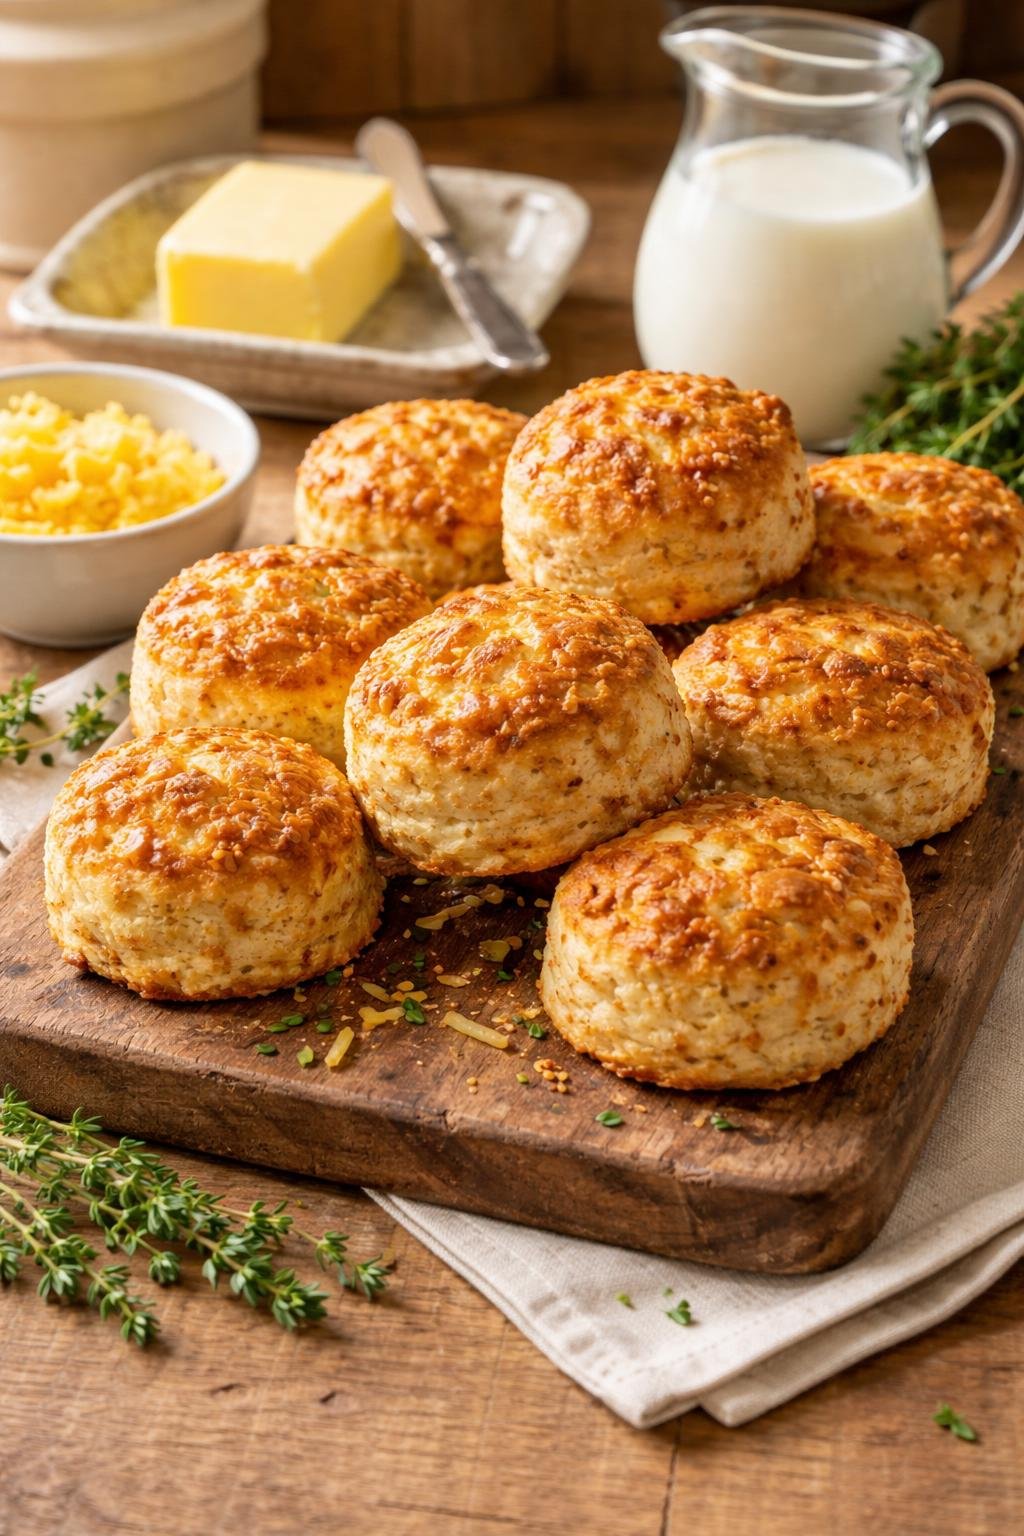
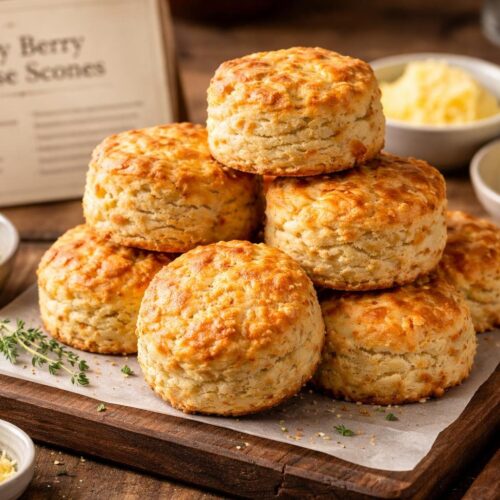
The sharp cheddar cheese gives them a bold and savory flavor. They have a golden, crunchy top that looks beautiful.
They are fast to bake and use simple pantry staples. Most importantly, they follow the classic British style that Mary Berry loves. You get a perfect rise every single time you bake them.
Equipment List
- Large mixing bowl
- Digital kitchen scales
- Measuring spoons
- Baking tray or sheet
- Parchment paper or baking liner
- 2-inch (5cm) round fluted cutter
- Pastry brush
- Wire cooling rack
- Sieve for sifting flour
Recipe Overview
- Recipe Name: Mary Berry Cheese Scones
- Servings: 10 to 12 scones
- Prep Time: 15 mins
- Cook Time: 12 mins
- Total Time: 27 mins
- Course: Snack / Breakfast
- Cuisine: British
- Calories: 210 kcal per serving
Ingredients You Need for Mary Berry Cheese Scones Recipe
To learn how to make Mary Berry Cheese Scones, gather these ingredients for Mary Berry Cheese Scones Recipe:
- 250g self-raising flour (plus extra for dusting)
- 1 teaspoon baking powder
- 1/2 teaspoon salt
- 1/2 teaspoon mustard powder (optional for zing)
- 50g cold salted butter (cubed)
- 125g mature cheddar cheese (grated)
- 150ml whole milk (plus a little for brushing)
- A pinch of cayenne pepper (for a tiny kick)
Step-by-Step Guide
1. Preheat and Prepare
Set your oven to 220°C (200°C fan or Gas Mark 7). Line your baking tray with parchment paper. This ensures your scones do not stick to the bottom.
2. Sift the Dry Ingredients
Sift the flour, baking powder, and salt into your large bowl. Add the mustard powder if you want extra flavor. Sifting makes the scones much lighter and airier.
3. Rub in the Butter
Add the cold butter cubes to the flour. Use your fingertips to rub the butter into the flour. Stop when the mixture looks like fine breadcrumbs.
4. Add the Cheese
Stir in about 100g of the grated cheddar cheese. Keep the remaining cheese aside for the topping later. Distribute the cheese evenly through the dry mix.
5. Pour in the Milk
Make a small well in the center of the mix. Pour in the milk slowly while stirring with a knife. Stop when a soft, slightly sticky dough forms.
6. Knead the Dough
Lightly flour your work surface and turn out the dough. Knead it very gently just to smooth it out. Do not overwork the dough or it becomes tough.
7. Roll and Cut
Roll the dough to about 2cm thickness. Use your fluted cutter to stamp out circles. Do not twist the cutter, as this stops the rise.
8. Glaze and Top
Place the scones on your prepared baking tray. Brush the tops with a little extra milk. Sprinkle the remaining grated cheese over each scone top.
9. Bake Until Golden
Bake in the hot oven for 10 to 12 minutes. They should be well-risen and golden brown on top. The cheese should be bubbly and crisp.
10. Cool and Enjoy
Transfer the scones to a wire rack to cool slightly. They are best served warm with a thick layer of butter. Enjoy the fresh, cheesy goodness!
Expert Tips & Variations
- Keep Ingredients Cold: Use cold butter and cold milk. This helps create steam in the oven for a better rise.
- Handle with Care: Only knead the dough a few times. Over-handling makes the scones hard instead of fluffy.
- The Cutter Trick: When cutting the dough, press straight down. Twisting the cutter seals the edges and prevents rising.
- Spice it Up: Add chopped chives or wild garlic for a fresh herb flavor.
- Change the Cheese: Use Red Leicester for a bright orange color. Smoked cheese also tastes amazing in this recipe.
- Avoid Thin Dough: Ensure your dough is at least 2cm thick before cutting. This gives you tall, proud scones.
Interesting Facts About Cheese Scones
Scones originated in Scotland in the early 1500s. Originally, they were large, flat cakes cooked on a griddle. Once baking powder was invented, they became the fluffy treats we love today.
In the UK, savory scones are a staple of “High Tea.” Mary Berry is known as the “Queen of Cakes” in Britain. She prefers simple, reliable methods that work for home cooks.
Cheese scones are often eaten with soup during the cold winter months. They are a beloved part of British baking history.
Perfect Dishes to Serve With Cheese Scones
These scones are very versatile and fit many meals. Serve them warm with a bowl of tomato or vegetable soup. They are also great with a platter of cold meats and pickles.
I love spreading them with cream cheese and topped with chives. Some people enjoy them with a side of scrambled eggs for breakfast.
They work well as a side for a hearty beef stew. You can even serve them as part of a savory afternoon tea.
Storage and Reheating Tips
- Room Temperature: Store in an airtight container for up to 2 days.
- Freezing: You can freeze these scones for up to 3 months. Wrap them tightly in foil or a freezer bag.
- Reheating: Warm them in a low oven at 150°C for 5 minutes. This brings back the “freshly baked” crunch.
- Microwave: Avoid the microwave as it can make the scones quite chewy.
- Raw Dough: You can freeze the unbaked circles and bake them from frozen. Just add 2 minutes to the baking time.
Nutrition Information
| Nutrient | Amount per Scone |
| Calories | 210 kcal |
| Total Fat | 11g |
| Saturated Fat | 7g |
| Carbohydrates | 22g |
| Sugars | 1g |
| Protein | 7g |
| Sodium | 350mg |
Health Benefits
These scones provide a good source of calcium from the cheese and milk. Calcium is vital for strong bones and healthy teeth. The flour provides carbohydrates which give you energy for the day.
If you use wholemeal flour, you can increase the fiber content significantly. Using mature cheddar means you get a lot of flavor with less cheese.
While they are a treat, they contain no artificial preservatives when made at home. Homemade baking allows you to control the amount of salt used.
FAQs about Mary Berry Cheese Scones Recipe
Can I use plain flour instead of self-raising flour?
Yes, you can use plain flour if you add more leavening. You will need to add 2 teaspoons of baking powder for every 150g of flour. Make sure to sift them together well.
Why did my cheese scones not rise?
Your scones might stay flat if your baking powder is old. Always check the expiration date on your tub. Also, make sure you did not roll the dough too thin before cutting.
Can I make these scones vegan?
You can substitute the butter with a plant-based block butter. Use soy or oat milk instead of cow’s milk. Choose a vegan cheese that melts well to maintain the texture.
What is the best cheese for this recipe?
A very strong or extra-mature cheddar is usually the best choice. It provides a sharp flavor that stands up to the flour. You can also mix in some parmesan for extra saltiness.
Final Thoughts
The Mary Berry Cheese Scones Recipe is a true kitchen classic. It is simple, fast, and incredibly satisfying to eat.
Whether you serve them with soup or just butter, they are always a hit. I hope you enjoy baking these as much as I do. Happy baking!
Mary Berry Cheese Scones Recipe
Ingredients
- 250 g self-raising flour plus extra for dusting
- 1 teaspoon baking powder
- 1/2 teaspoon salt
- 1/2 teaspoon mustard powder optional for zing
- 50 g cold salted butter cubed
- 125 g mature cheddar cheese grated
- 150 ml whole milk plus a little for brushing
- A pinch of cayenne pepper for a tiny kick
Instructions
Preheat and Prepare
- Set your oven to 220°C (200°C fan or Gas Mark 7). Line your baking tray with parchment paper. This ensures your scones do not stick to the bottom.
Sift the Dry Ingredients
- Sift the flour, baking powder, and salt into your large bowl. Add the mustard powder if you want extra flavor. Sifting makes the scones much lighter and airier.
Rub in the Butter
- Add the cold butter cubes to the flour. Use your fingertips to rub the butter into the flour. Stop when the mixture looks like fine breadcrumbs.
Add the Cheese
- Stir in about 100g of the grated cheddar cheese. Keep the remaining cheese aside for the topping later. Distribute the cheese evenly through the dry mix.
Pour in the Milk
- Make a small well in the center of the mix. Pour in the milk slowly while stirring with a knife. Stop when a soft, slightly sticky dough forms.
Knead the Dough
- Lightly flour your work surface and turn out the dough. Knead it very gently just to smooth it out. Do not overwork the dough or it becomes tough.
Roll and Cut
- Roll the dough to about 2cm thickness. Use your fluted cutter to stamp out circles. Do not twist the cutter, as this stops the rise.
Glaze and Top
- Place the scones on your prepared baking tray. Brush the tops with a little extra milk. Sprinkle the remaining grated cheese over each scone top.
Bake Until Golden
- Bake in the hot oven for 10 to 12 minutes. They should be well-risen and golden brown on top. The cheese should be bubbly and crisp.
Cool and Enjoy
- Transfer the scones to a wire rack to cool slightly. They are best served warm with a thick layer of butter. Enjoy the fresh, cheesy goodness!
Notes
- Keep Ingredients Cold: Use cold butter and cold milk. This helps create steam in the oven for a better rise.
- Handle with Care: Only knead the dough a few times. Over-handling makes the scones hard instead of fluffy.
- The Cutter Trick: When cutting the dough, press straight down. Twisting the cutter seals the edges and prevents rising.
- Spice it Up: Add chopped chives or wild garlic for a fresh herb flavor.
- Change the Cheese: Use Red Leicester for a bright orange color. Smoked cheese also tastes amazing in this recipe.
- Avoid Thin Dough: Ensure your dough is at least 2cm thick before cutting. This gives you tall, proud scones.

Emily Carter is a passionate home cook and recipe creator. She shares easy, family-friendly meals with a modern twist. Her focus is on simple ingredients, clear steps and soulful, delicious food that everyone can enjoy.