
Do you want to make a perfect pie at home? This Joanna Gaines Pie Crust Recipe is the answer. It is flaky, buttery, and very easy to follow.
Learning how to make Joanna Gaines Pie Crust will change your baking game forever. This recipe comes from her famous Magnolia Table cookbook.
It uses simple ingredients for Joanna Gaines Pie Crust that you likely have. Let’s bake a delicious crust together today!
What Makes This Joanna Gaines Pie Crust Special
This recipe is special because it balances flavor and texture perfectly. Many pie crusts are either too tough or too crumbly.
Joanna uses a mix of butter and vegetable shortening. The butter gives it a rich, homemade taste. The shortening makes the crust extra flaky and easy to handle.
It is a very forgiving dough for beginners. You do not need to be a professional chef to master it. It feels like a warm hug from a farmhouse kitchen.
This crust works for both sweet and savory pies. You can use it for apple pie or a chicken pot pie. It holds its shape well during baking. The edges turn a beautiful golden brown every time. It truly is the ultimate foundation for any pie filling.
Equipment List
- Large mixing bowl
- Pastry cutter or a fork
- Measuring cups and spoons
- Plastic wrap
- Rolling pin
- 9-inch pie plate
- Kitchen scale (optional but helpful)
Recipe Overview
- Recipe Name: Joanna Gaines Pie Crust
- Servings: 2 crusts (top and bottom)
- Prep Time: 20 mins
- Cook Time: 0 mins (unbaked)
- Total Time: 1 hour 20 mins (includes chilling)
- Course: Dessert / Base
- Cuisine: American
- Calories: 140 kcal per serving
Ingredients You Need for Joanna Gaines Pie Crust Recipe
- 2 ½ cups All-purpose flour
- 1 tablespoon Granulated sugar
- 1 teaspoon Salt
- ½ cup Cold unsalted butter (cubed)
- ½ cup Vegetable shortening (cold)
- 6 to 8 tablespoons Ice-cold water
Step-by-Step Guide
1. Mix Dry Ingredients
Whisk the flour, sugar, and salt in a large bowl. Ensure there are no large lumps in the flour. This creates a smooth base for your dough. Mixing well helps distribute the flavor evenly.
2. Add Butter and Shortening
Add the cold butter cubes and shortening to the flour. Use a pastry cutter to blend them together. Stop when the mixture looks like coarse crumbs. You should still see tiny bits of fat.
3. Add Ice Water
Drizzle six tablespoons of ice water over the mixture. Use a fork to gently toss the dough. If it feels too dry, add more water slowly. The dough should just hold together when squeezed.
4. Form the Dough Balls
Turn the dough onto a lightly floured surface. Divide the dough into two equal halves. Shape each half into a smooth, flat disk. Do not overwork the dough or it will become tough.
5. Chill the Dough
Wrap each disk tightly in plastic wrap. Place them in the refrigerator for at least one hour. Chilling allows the gluten to relax. It also keeps the fat cold for a flakier crust.
6. Roll the Crust
Take one disk out of the fridge. Roll it out on a floured surface with a rolling pin. Aim for a circle about 12 inches wide. Keep the thickness even for the best bake.
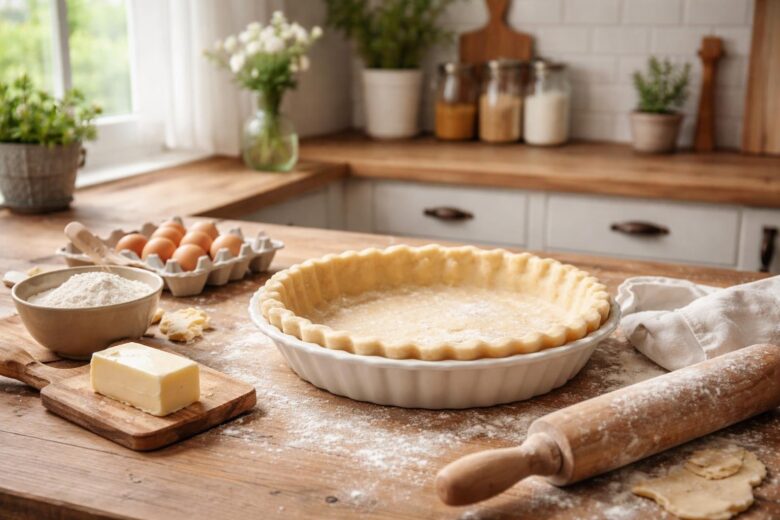
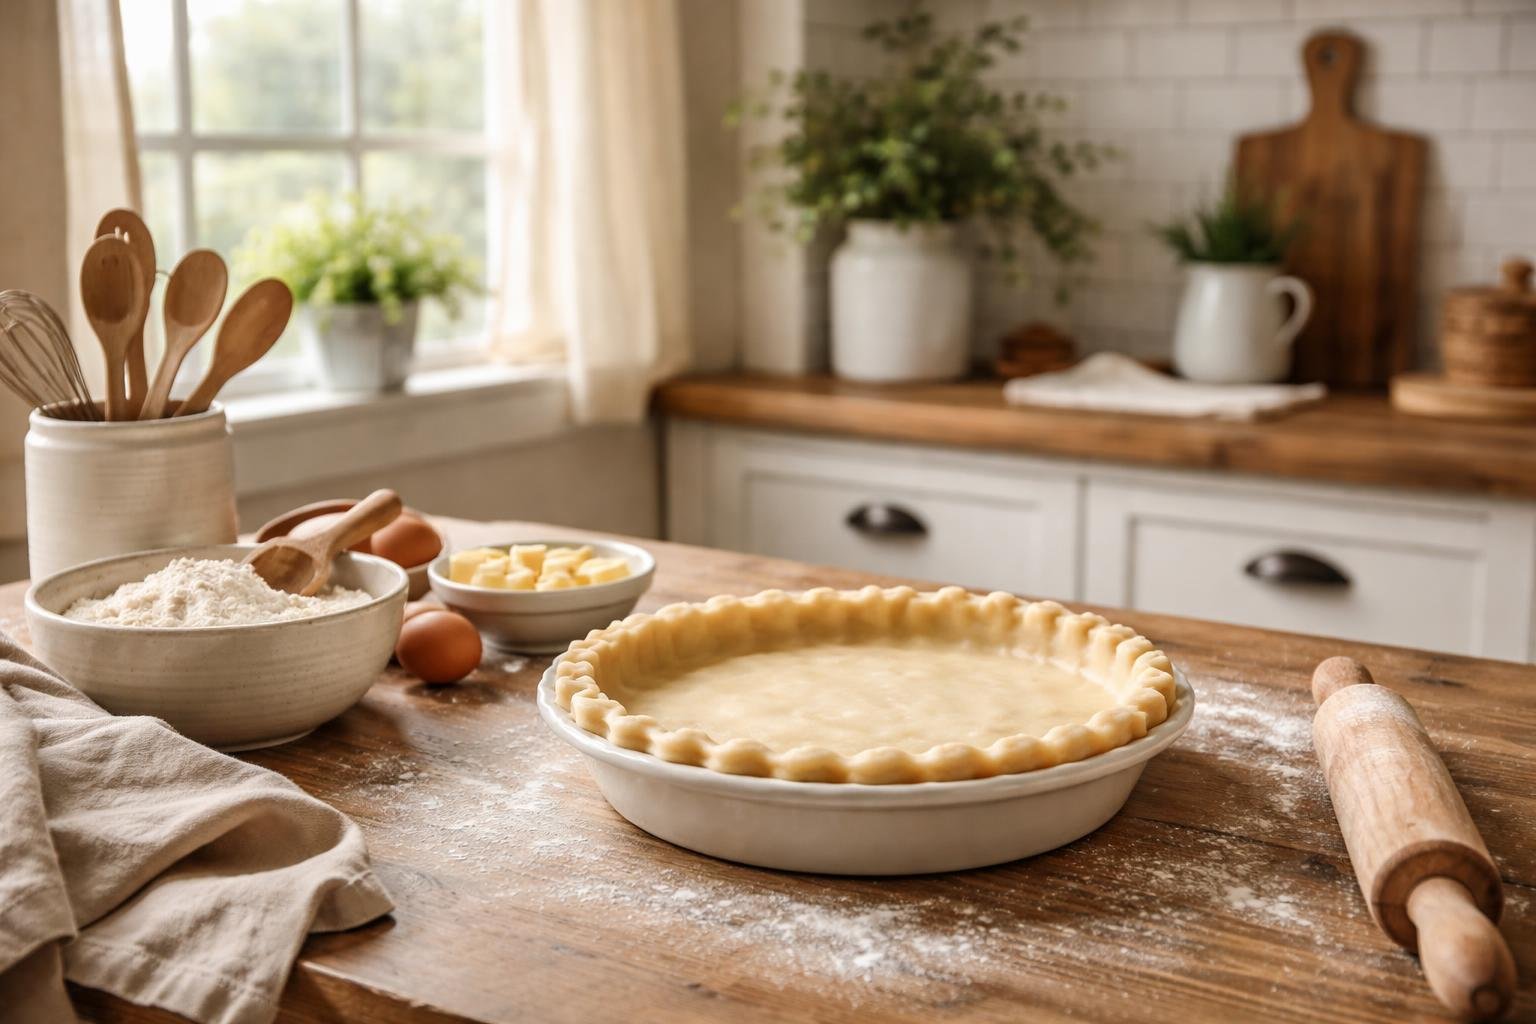
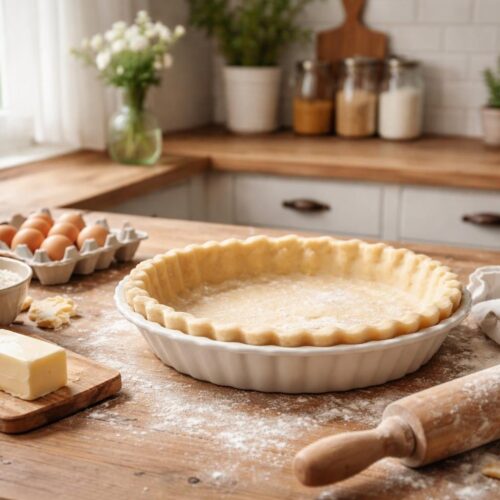
7. Place in Pie Plate
Gently fold the dough in half to lift it. Place it into your 9-inch pie plate. Unfold it and press it against the bottom and sides. Trim any extra dough hanging over the edge.
8. Crimp the Edges
Fold the overhang under itself to create a thick border. Use your fingers to pinch or flute the edges. This makes the pie look professional and beautiful. Your crust is now ready for filling!
Expert Tips & Variations
- Keep everything cold: Use frozen butter and ice-cold water. Cold fat creates steam in the oven, which makes layers.
- Don’t overmix: Stop mixing as soon as the dough forms. Overmixing leads to a hard, chewy crust.
- Use a food processor: If you lack a pastry cutter, use a processor. Pulse briefly so you don’t melt the butter.
- Add herbs: For savory pies, add dried thyme or rosemary to the flour.
- Sweeten it up: Add an extra tablespoon of sugar for dessert pies.
- Vinegar trick: Add a teaspoon of apple cider vinegar to the water. It helps keep the crust tender.
- Egg wash: Brush the edges with beaten egg before baking. This gives a shiny, golden finish.
Interesting Facts About Pie Crust
Did you know pie crusts were once called “coffyns”? In medieval times, they were thick and not meant to be eaten. They were just containers to keep meat moist while cooking. Thankfully, recipes like this one focus on taste!
Joanna Gaines is known for her “Magnolia” style. This style focuses on family, comfort, and simplicity. This pie crust reflects those values perfectly. It is meant to be shared with loved ones at a big table.
Another fun fact is that shortening was invented as a cheaper alternative to lard. However, bakers soon realized it created a very stable crust.
Combining it with butter, as Joanna does, provides the best of both worlds. You get the flavor of butter and the texture of shortening.
Perfect Dishes to Serve With Pie Crust
This crust is very versatile. You can use it for a classic Homemade Apple Pie. It also works wonderfully for a Pumpkin Pie during the holidays. If you want something savory, try a Quiche Lorraine.
The crust is strong enough to hold heavy fillings like Pecan Pie. You can even cut the dough into strips to make a lattice top. It looks beautiful on a Berry Cobbler. For a quick snack, bake leftover scraps with cinnamon and sugar!
Storage and Reheating Tips
- Refrigerate dough: Raw dough stays fresh in the fridge for up to 3 days.
- Freeze dough: Wrap disks in foil and freeze for up to 3 months.
- Thawing: Thaw frozen dough in the fridge overnight before rolling.
- Baked crust storage: A baked pie can stay at room temperature for 2 days.
- Reheating: Reheat slices in a toaster oven at 300°F. This keeps the crust crispy.
- Avoid microwave: Microwaving can make the crust soggy and rubbery.
Nutrition Information
| Nutrient | Amount Per Serving |
| Calories | 140 kcal |
| Total Fat | 9g |
| Saturated Fat | 4g |
| Cholesterol | 10mg |
| Sodium | 150mg |
| Carbohydrates | 13g |
| Protein | 2g |
Health Benefits
While pie crust is a treat, making it from scratch is healthier. You avoid the preservatives found in store-bought dough.
You can control the amount of salt and sugar used. Using real butter provides some fat-soluble vitamins like Vitamin A.
Homemade baking also reduces stress for many people. It is a mindful activity that rewards you with a delicious meal.
When you bake at home, you know exactly what goes into your food. This makes it a better choice for your family and friends.
FAQs about Joanna Gaines Pie Crust Recipe
Can I use only butter for this recipe?
Yes, you can replace the shortening with more butter. However, the crust might be slightly less flaky. Butter melts faster, so work quickly to keep the dough cold.
Why did my pie crust shrink in the oven?
Shrinking happens if the dough is not chilled long enough. The gluten needs time to relax after rolling. Always chill your dough for at least 30 minutes before baking it.
Can I make this pie crust gluten-free?
You can try using a 1:1 gluten-free flour blend. The texture will be different, and it may be more crumbly. You might need a little extra water to hold it together.
How do I prevent a soggy bottom?
You can “blind bake” the crust first. Prick the bottom with a fork and bake with weights for 10 minutes. This creates a barrier before you add the wet filling.
Final Thoughts
This Joanna Gaines Pie Crust Recipe is a true kitchen essential. It is simple, reliable, and tastes like home.
Whether it is a holiday or a Tuesday, a good pie makes everything better. Now that you know how to make Joanna Gaines Pie Crust, go start baking! Happy cooking!
Search Queries for more:
- Best flour for pie crust
- Magnolia Table pie recipes
- How to crimp pie edges for beginners
Joanna Gaines Pie Crust Recipe
Ingredients
- 2 ½ cups All-purpose flour
- 1 tablespoon Granulated sugar
- 1 teaspoon Salt
- ½ cup Cold unsalted butter cubed
- ½ cup Vegetable shortening cold
- 6 to 8 tablespoons Ice-cold water
Instructions
Mix Dry Ingredients
- Whisk the flour, sugar, and salt in a large bowl. Ensure there are no large lumps in the flour. This creates a smooth base for your dough. Mixing well helps distribute the flavor evenly.
Add Butter and Shortening
- Add the cold butter cubes and shortening to the flour. Use a pastry cutter to blend them together. Stop when the mixture looks like coarse crumbs. You should still see tiny bits of fat.
Add Ice Water
- Drizzle six tablespoons of ice water over the mixture. Use a fork to gently toss the dough. If it feels too dry, add more water slowly. The dough should just hold together when squeezed.
Form the Dough Balls
- Turn the dough onto a lightly floured surface. Divide the dough into two equal halves. Shape each half into a smooth, flat disk. Do not overwork the dough or it will become tough.
Chill the Dough
- Wrap each disk tightly in plastic wrap. Place them in the refrigerator for at least one hour. Chilling allows the gluten to relax. It also keeps the fat cold for a flakier crust.
Roll the Crust
- Take one disk out of the fridge. Roll it out on a floured surface with a rolling pin. Aim for a circle about 12 inches wide. Keep the thickness even for the best bake.
Place in Pie Plate
- Gently fold the dough in half to lift it. Place it into your 9-inch pie plate. Unfold it and press it against the bottom and sides. Trim any extra dough hanging over the edge.
Crimp the Edges
- Fold the overhang under itself to create a thick border. Use your fingers to pinch or flute the edges. This makes the pie look professional and beautiful. Your crust is now ready for filling!
Notes
- Keep everything cold: Use frozen butter and ice-cold water. Cold fat creates steam in the oven, which makes layers.
- Don’t overmix: Stop mixing as soon as the dough forms. Overmixing leads to a hard, chewy crust.
- Use a food processor: If you lack a pastry cutter, use a processor. Pulse briefly so you don’t melt the butter.
- Add herbs: For savory pies, add dried thyme or rosemary to the flour.
- Sweeten it up: Add an extra tablespoon of sugar for dessert pies.
- Vinegar trick: Add a teaspoon of apple cider vinegar to the water. It helps keep the crust tender.
- Egg wash: Brush the edges with beaten egg before baking. This gives a shiny, golden finish.

Emily Carter is a passionate home cook and recipe creator. She shares easy, family-friendly meals with a modern twist. Her focus is on simple ingredients, clear steps and soulful, delicious food that everyone can enjoy.